The Stationery Editor is a comprehensive tool for creating and editing stationery.
The editor can be used to create new stationery from multiple elements (graphics, PDFs, dynamic text and QR codes). Specify the page or page area where you want a stationery element displayed and decide whether it should appear in the foreground or background.

Edit stationery
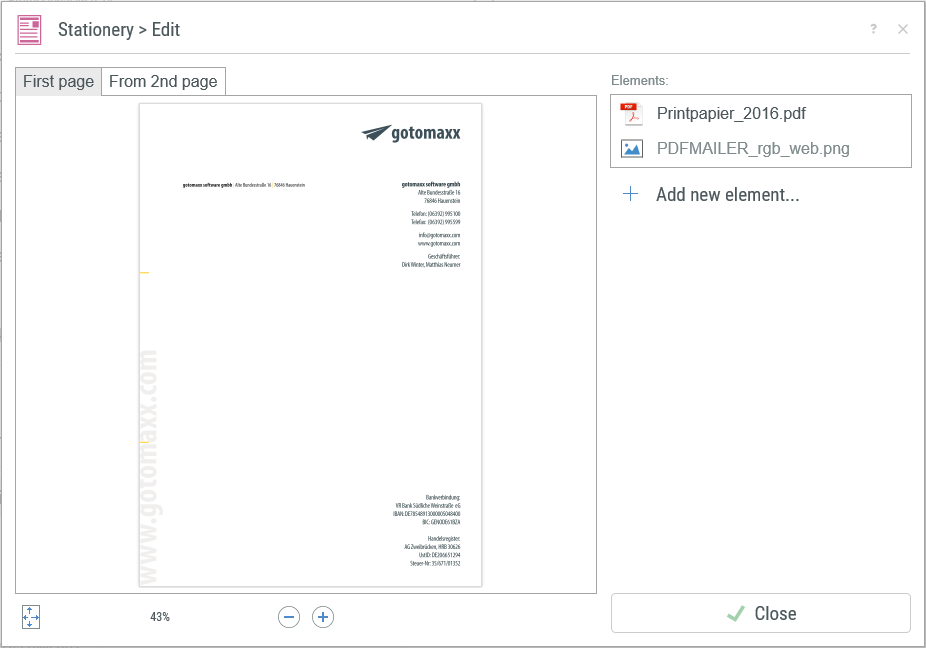
The Stationery Editor provides a large preview of your stationery in the middle of the screen. Above the preview, you can see which elements will be displayed on which pages or page areas (or some elements should appear only on specific pages).
A list of all elements that were added to the stationery or are available for adding is shown on the right.
Hovering over an element with the cursor allows you to open more options when you click the three dots ![]() at the end.
at the end.
Click the button “+ Add new element” to add more elements to your stationery.
Add element
Click the button “+ Add new element” to see a selection of available elements. There you can select the type of element you want to add. Various settings will be required depending on the type of element.
Insert image
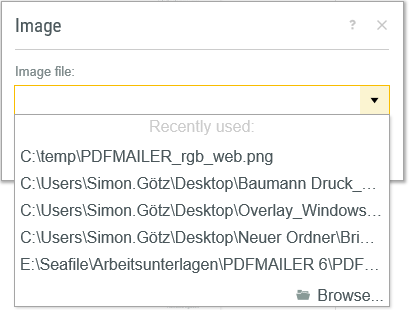
Click “Insert image” to insert an individual image, e.g. a logo, as part of the stationery. Select one of the most recently opened images from the list or browse your hard drive for other images by clicking “Browse”.
PNG, BMP, JPG and TIFF file formats are supported.

Add Image
A selected image will immediately appear in the preview and in the list of elements. Individual elements can moved via drag and drop. The size of the element can be adjusted by dragging the corners.
Add PDF
Click “Add PDF” to insert an individual PDF, e.g. a logo, as part of the stationery or a complete A4 page. Select one of the most recently opened images from the list or browse your hard drive for other images by clicking “Browse”. Individual elements can moved via drag and drop. The size of the element can be adjusted by dragging the corners.
Add text
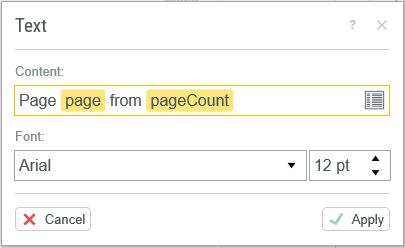
Click “Add text” to insert a fixed or variable text element. Define a fixed text via “Content” or select any variable via the Variable drop-down ![]() list. Click “Font” to select the font type and size.
list. Click “Font” to select the font type and size.

Add text
Click “Apply” to add the text to the preview and to the list of elements. Individual elements can moved via drag and drop. PDFMAILER will insert the text at the correct position and resolve any variables as needed when the stationery is later used.
Add QR code
Click “Add QR code” to insert a QR code with fixed or dynamic content. Define a fixed text via “Content” or select any variable via the Variable drop-down ![]() list. Click “Apply” to add the QR code to the preview and the to list of elements. Individual elements can moved via drag and drop. The size of the element can be adjusted by dragging the corners. PDFMAILER will insert the QR code at the correct position and resolve any variables as needed when the stationery is later used.
list. Click “Apply” to add the QR code to the preview and the to list of elements. Individual elements can moved via drag and drop. The size of the element can be adjusted by dragging the corners. PDFMAILER will insert the QR code at the correct position and resolve any variables as needed when the stationery is later used.
Positioning elements
Hovering over an element with the cursor (on the right) allows you to open more element options when you click the three dots ![]() at the end. You can e.g. specify on which page an element should be displayed. This will be useful if you want the complete stationery design (with logo, header and footer) to be displayed on the first page only, and only the logo on all subsequent pages.
at the end. You can e.g. specify on which page an element should be displayed. This will be useful if you want the complete stationery design (with logo, header and footer) to be displayed on the first page only, and only the logo on all subsequent pages.
Mark each element to specify the pages on which they should appear.
When an element is added to a new page range, a tab will appear above the preview.
![]()
Clicking the tab allows you to see which elements are positioned where in the relevant range of pages.